


Ready to transform your garden with olla irrigation? Installing ollas is simple, but doing it right ensures youReady to transform your garden with olla irrigation? Installing ollas is simple, but doing it right ensures you get the most out of this ancient watering method. Whether you’re a beginner or a seasoned gardener, our guide will help you set up your ollas for maximum efficiency and plant health.
At SmartiLiving, we’ve helped thousands of gardeners make the switch to ollas. In this article, we’ll walk you through the entire process—from choosing the right spot to maintaining your system for seasons to come.
What You’ll Need
- SmartiLiving Ollas (number depends on your garden size)
- A trowel or small shovel
- Watering can or hose
- Mulch (optional but recommended)
Step-by-Step Installation Guide
1. Choose the Right Location
- For Garden Beds: Place ollas every 2–3 feet for even coverage.
- For Containers: One small olla per large pot (e.g., 5-gallon size).
- Tip: Install ollas before planting for easiest setup.
2. Dig the Hole
- Dig a hole deep enough to bury the olla up to its neck.
- The hole should be slightly wider than the olla for easy placement.
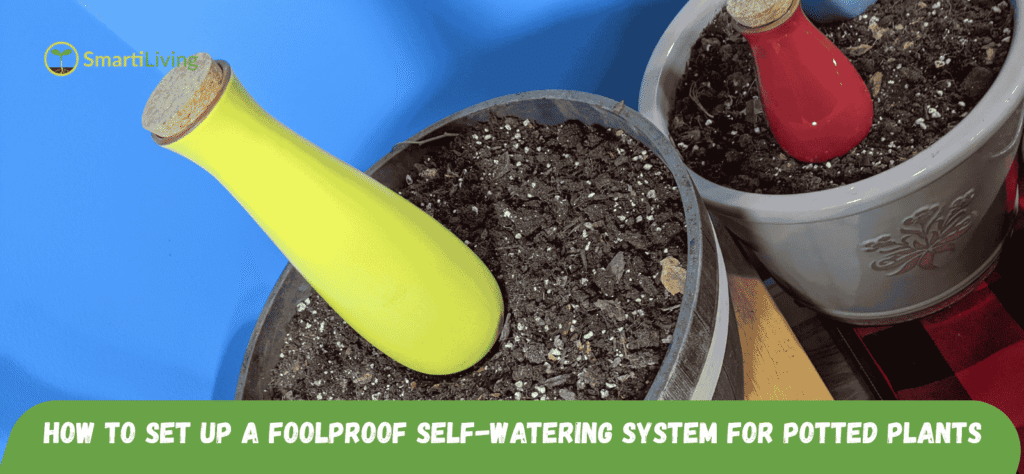
3. Place the Olla
- Set the olla in the hole, ensuring the neck is above the soil surface.
- Pack soil firmly around the base to eliminate air pockets.
4. Plant Around the Olla
- Plant seeds or seedlings in a circle around the olla.
- Pro Tip: Plant moisture-loving crops (e.g., tomatoes, squash) closest to the olla.
5. Fill and Test
- Fill the olla with water and cover the opening with its lid or a stone.
- Check how long it takes to empty this helps you learn your garden’s watering needs.
6. Add Mulch (Optional)
- Apply mulch around the olla and plants to further reduce evaporation and weeds.
Maintenance Tips
- Refill every 5–14 days, depending on weather and plant needs.
- Clean ollas annually with a brush to prevent mineral buildup.
- Store indoors during freezing winters to prevent cracking.
Why Choose SmartiLiving Ollas?
Our ollas are lead-free, durable, and designed for optimal water flow. They’re handmade to last seasons, not just a few uses.
👉 Shop SmartiLiving Ollas Here
For more tips, read our full guide: 5 Surprising Benefits of Using Ollas in Your Garden.
Have questions about installing ollas? Ask us in the comments below!